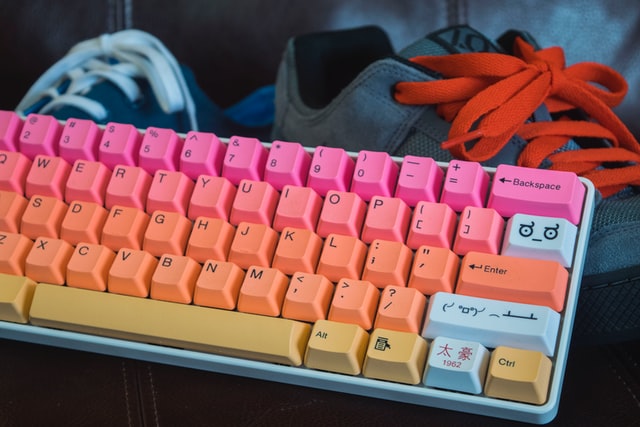
Das Keyboard devices are no exception to the rule that high-quality mechanical keyboards can endure decades. Spills are a different story; thus, they’ll be dealt with separately. Simple efforts may be taken to keep the computer gaming setup clean and to ensure that your mechanical keyboard lasts as long as possible
Table of Contents
In order to eliminate any crumbs or dirt, turn the keyboard upside down
Dust may be removed from the keyboard plate using a handheld vac or the hose connection on an upright vacuum with a brush head attached. Cover the gaps between keys by sliding across them. Push the tube gently into your keyboard to avoid causing harm.
If you’re trying to disinfect or remove stains, moisten a microfiber cloth with isopropyl alcohol and water and wipe down the entire keyboard gently. It’s also fine to use a disposable wipe, but don’t use harsh cleaners or spray cleaning solutions directly on the keyboard. With the towel, wipe the top of the keyboard, the spaces between keys, and the edges of the frame on either side.
Remove any leftover moisture from the surface with some other clean dry cloth
Cleaning your keyboard wrist rest and gaming mouse pad with a moist cloth is also a good idea.
For a more thorough cleaning (recommended every 1-2 months for best results) or to deal with sticky keys:
Remove the keyboard from the power supply. Remove all small keycaps with the keycap removal tool that came with your Element box.
Soak all of the keycaps in a container filled with warm water as well as dish soap for several hours
Once the keycaps have been removed, use a vacuum with a brush attachment or compressed air to clean the keyboard frame of any dust, dirt, debris, hair, or other detritus. After wiping the keyboard frame with a spotless, dry towel, allow it to air dry completely before using it again. Remove all keycaps from water and pat them dry with such a clean cloth to prevent rusting.
Align the keys correctly, then press down on the keycap to firmly seat it in the mechanical switch. Use three fingers to firmly press the keycap down into the stabilizer on larger keycaps with stabilizers.
The Most Effective Methods for Cleaning the Mechanical Keyboard
Disconnect your computer’s keyboard with care
Turn your keyboard upside down and tap it with one hand while holding it firmly with the other to remove crumbs and dust.
Cleaning a keyboard with a small hand vacuum cleaner is also a good idea
If you spilt water, coffee, or any other liquid on your keyboard, soak up as much as you can with a cloth. To absorb the moisture, dab slowly and leave for a few seconds.
Clean the keyboard by wiping it slightly damp clean towel
Cleaning your keyboard with a keyboard cleaning gel could be a good idea. Cleaning gel, which adheres to the curvature of the keyboard to reach regions that a cloth cannot, can be a very effective way to clean mechanical keyboards.
Your mechanical keyboard should be cleaned
Please clean your keyboard from time to time, regardless of the equipment you use. They could easily be misconstrued for purpose-built trash traps if we didn’t already know they were made for typing symbols into a computer. Keyboards are a magnet for dust, skin, and crumbs, thanks to the tiny gaps all over, regular hand touch, and their natural home of “just below your mouth.”
The following items are required:
- a single soiled keyboard
- a dry, clean towel
- Brush, small
- Perhaps a pressurized air can.
- By turning the keyboard upside down, you can give it a good shake
This is a basic, almost brutal first step, but it can help loosen grit without requiring any actual cleaning. For mechanical keyboards, in particular, where there is typically more space between both the keycaps as well as the chassis for dust to escape, this is especially important to consider. Keep going after such step, and avoid shaking the computer over soft ground that you’ll have had to clean later, including a mouse mat or your desk top.
- Using a brush, lightly dust the surface
If you can’t or don’t want to remove your board’s keycaps, try to clear away as much guck as possible while dusting the sides of the keycaps. You can buy specialized keyboard brushes for this, as well as the radioactive-looking ooze that seeps through the cracks and peels off, but I’m not certain that these are necessary when a regular toothbrush or paintbrush will suffice. Simply massage this between each key, working it in thoroughly, and you’ll be able to remove virtually all visible dust. You should be able to scoop up a lot of the dirt that’s been hiding behind
- Use a cloth to scrub the area
The standard, under-the-sink-in-the-cabinet-specification cloth is just as useful for cleaning your keyboard as it is for cleaning the rest of your computer and accessories. Rub in an inconspicuous quantity of multi-surface polish with a clean cloth, working it into the filthy regions of the keypad, and then buff with a dried portion of cloth till everything is sparkling again for really stubborn stains.
- Take your keycaps out from the keyboard and set them aside
To remove each keycap from the majority of mechanical keyboards, simply press the keycaps toward you and your fingertips. This includes the large keys such as the spacebar or Enter key.
- Take a shower with your keycaps
If you really want to clean your keyboard, soak all of the keycaps in soapy water before reattaching them. This isn’t quite as crazy as it appears: it disinfects the keycaps while also softening any remaining skin layer. Because the keycaps contain no electronics, simply soak them for a few minutes before drying them fully on a towel or kitchen roll.
