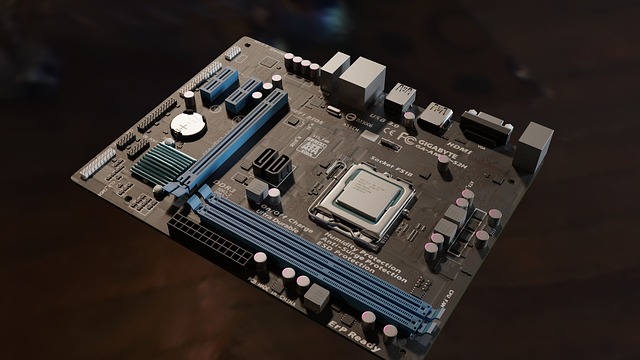
As a responsible computer user, keeping your motherboard clean is essential. There are a lot of ports and modules on your motherboard. Dust and dirt may obstruct connections to the motherboard and even prevent your computer from functioning, owing to the fact that they raise the temperature on the board. Cleaning the motherboard, as well as the rest of the computer components, should be included in everyone’s to-do list.
Some people, however, will need to go a step further and clean their motherboard thoroughly in order for it to function properly. Motherboards are fragile devices, and making the incorrect step might cause the equipment to malfunction and become useless in the future.
It doesn’t need any special equipment, and it doesn’t necessitate removing your computer’s motherboard. The majority of individuals just need to undertake this kind of motherboard cleaning. Deep cleaning necessitates the use of alcohol as well as a great deal of care. You may brick the motherboard if you do it incorrectly.
For context, I’ve only ever had to thoroughly clean a motherboard once, when we purchased a potentially broken motherboard for a test build that had obvious dirt on it. My family uses three computers on a regular basis, and the motherboards we bought new for them have never needed to be thoroughly cleaned.
Routine Cleaning
Use compressed air and a very gentle brush to give your motherboard a thorough cleaning. Because dust will fly out of the computer, you should place it in an easy-to-clean location.
1. Slide the computer’s side panel open. Remove all panels if there is more than one. You’ll need some room for the dust to exit the machine.
2. Spray a compressed air can on the machine’s components to eliminate the dust. Because dust will fall and settle on lower components as you proceed, it’s best to begin at the top and work your way down.
3. When working on your motherboard, start at the rear and work your way to the front of the case. The tip of the pressurized air can should not come into direct contact with the motherboard. Maintain a distance of roughly an inch between the cable and the motherboard. Apply compressed air to the motherboard until all loose dust has been removed.
4. Check for any remaining dust on the motherboard. There may be difficult-to-reach locations, or you may need to clear stuck-on dust.
5. Gently clean any dust from the motherboard with the soft brush.
6. Use compressed air to clean the computer and its components, including the motherboard, once again.
7. Restart your computer as normal after closing it.
It’s a good idea to do other computer maintenance tasks while cleaning your motherboard. The case fans may be removed, cleaned, and dried. You may tidy up any overlapping cords or examine your wiring for loose connections. This method of cleaning your motherboard, at least once a quarter, is a wonderful way to maintain it in good operating order. Dust removal will also prevent it from overheating, which will improve performance.
Depending on where they’re positioned in a room, some computers accumulate dust faster than others. We bought one that had been in a flooded house and couldn’t guarantee that it would function. There was evident dirt caked on it. It was functional again after we thoroughly cleaned it. Even with the most attentive and thorough deep cleaning, such outcomes cannot be guaranteed. Make certain you have the following items before you begin:
Cotton pads that are lint-free
• Isopropyl alcohol at a concentration of 99 percent
• A metal tub that is bigger than your motherboard’s dimensions
• Nylon-bristled brush
• Drying towel with no lint
Before trying to thoroughly clean a computer, you must first remove the motherboard. Nothing else should be plugged into it. Make sure you’re simply cleaning the motherboard and not the CPU, wires, or any attached devices.
Dirty Spots
Try this if just a tiny portion of your motherboard is filthy.
1. Place the motherboard on a lint-free cloth to protect it. Look through it to see which places you need to clean the most.
2. Apply isopropyl alcohol to a lint-free cotton pad. Dab it gently on the motherboard’s dirty spots. Wet a fresh pad and return to the board when the filth on each pad appears. Clean the visible dirt until the pad becomes white.
3. Dry the motherboard completely before reinstalling it in your computer.
Extremely Dirty Motherboard
If your motherboard is completely messed up, try the following:
1. Fill the tub with 99 percent isopropyl alcohol to about an inch above the bottom.
2. Submerge the motherboard in the bath.
3. In the liquid, gently agitate it. Make that the alcohol reaches all of the afflicted regions. It should be raised.
4. Gently remove any tenacious dirt from the motherboard with the nylon brush. Re-agitate it by dipping it back into the alcohol.
5. Set it on a lint-free cloth after removing it from the alcohol. Replace it on your computer after allowing it to dry for at least 24 hours but I prefer 48 hours.
Is Washing A Motherboard Allowed?
People have successfully cleaned motherboards, and in some cases, it’s the only way to get them to work again. The drying time, on the other hand, is quite important. Wait at least a week before plugging the motherboard back in if any liquids other than 99 percent pure isopropyl alcohol have come into contact with it. Compressed air is the most convenient and secures way to clean the motherboard. You can either buy compressed air in a can or use a “blower,” which compresses air without heating it.
1. Corrosion near solder joints is one of the most common problems.
2. Discoloration near the motherboard, which could be white or another colour.
3. A keyboard that is sticky.
4. A bubble appears under the laptop screen.


