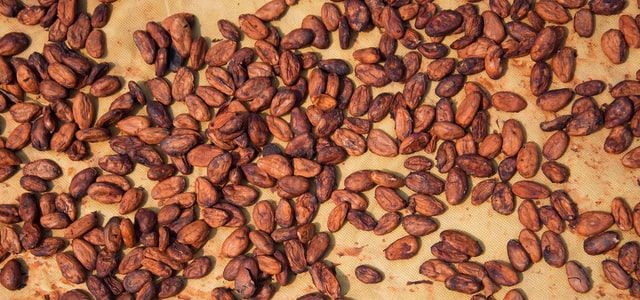
Fermenting cacao beans at home is one of the secrets to making great chocolate. Fermented cacao beans taste so rich, they are incredible. Fermenting cacao beans is not an easy task. It takes an awful lot of work and a whole lot of patience.
Table of Contents
Fermenting cacao
The first step in the process of making chocolate is fermenting the cacao beans, which begins when they are picked and removed from their pods. The beans are then placed into large wooden boxes or mats, where they ferment for around five to seven days. During this time, the beans become soft and the flavour develops.
Once the fermentation process is complete, the beans are dried by spreading them out on large concrete patios or drying racks. They are then stored in bags until they are ready to be shipped off to a chocolate maker.
Selecting and sorting your cacao beans
Selecting and sorting your cacao beans is important. You’ll want to start with a good quality cacao bean, one that has a sweet smell to it. A lot of cacao beans will have an unpleasant smell to them, so make sure yours smell sweet.Once you’ve selected your cacao beans, you’ll want to sort them.
You’ll want to pick out the ones that are discolored or broken or damaged in some way, as well as the sticks and twigs and any other foreign objects that may have gotten in there.You can then weigh your cacao beans and figure out how much salt you’ll need for them.I’m going to be using a 5% salt solution for this ferment, which means that I’ll be using 50 grams of salt for every kilogram of wet cacao beans (or 100 grams of salt for every two kilograms of wet cacao beans).
Washing your cacao beans
- Place your cacao beans in a large bowl or bucket and fill it with water. The water should be at least half the volume of the container, but more is better.
- Let the beans soak for an hour, then drain and rinse the beans.
- You can use your hands to help dislodge any debris or to remove any broken or damaged beans.
- Repeat this rinsing process again with fresh water.
- Then let the beans dry by spreading them out on a tray covered with a clean cloth or paper towel.
Heating and cooling your cacao beans
- You can use a food dehydrator or your oven on the lowest setting to heat the cacao beans. This step is meant to get rid of any excess moisture and make it easier to break up the cacao beans.
- If you’re using an oven, preheat it to under 100°C.
- Spread the beans out on a baking tray and place them in the oven for about 30 minutes. You can also do this in your dehydrator at 80°C for about 30 minutes, if you have one.
This is what the cacao beans should look like after heating them.
- Make sure you keep an eye on them so they don’t burn! The goal here is to drive off some of the moisture, which will make it easier to break up the cacao beans later.
- Once they’re done, let them cool down to room temperature before placing them inside your fermentation vessel.
Drying your cacao beans
Drying cacao beans is a crucial step in the process. When harvested, cocoa beans are about 60% water. They need to be reduced to about 8-10%.
- The best way to do this is in a fermentation box, designed specifically for fermenting cocoa beans. The boxes have holes in the bottom and sides to allow airflow, and removable shelves so that the beans can be stirred or rotated during drying.
- If you don’t have a fermentation box, you can still dry your beans on racks or trays of some kind, just make sure there is plenty of air circulation. They should be dry within 5 days or so.
Fermentation process
Fermentation of cacao beans is a lengthy process and can take up to eight days. The cacao beans need to be left in a warm, dark environment for this time so that the fermentation process can begin.
- The first stage of the process takes around five days and consists of the beans being left in large wicker baskets with banana leaves covering them. This allows the beans to develop their aroma
- A second stage of fermentation occurs after the beans have been removed from the baskets. They are then placed in a large wooden box with a lid on it. This allows them to develop their flavour properly, as well as allowing any remaining pulp to dry out and fall off of the beans.
Cacao beans can be eaten at this point if they are roasted, but they will contain less antioxidants than they would if they had not been fermented. If you’re planning on making chocolate at home with them, then you should leave them to ferment for longer so that they do not go rancid when you roast them yourself.
Conclusion
Fermenting the cacao beans properly takes a lot of love and care, but once you get the hang of it, you’ll soon have 100% natural chocolate for more delicious desserts than you could have ever expected. Best of all, there’s no need to rush the process to have a treat within hours. Just take your time and enjoy fermenting your beans the natural way.


