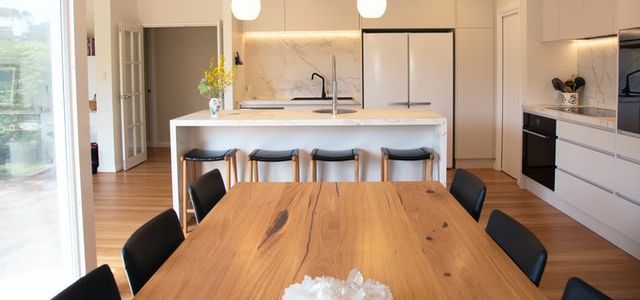
Building a kitchen island with seating might be more accessible than you think. The right plans can make all the difference in the world. It is easy to think that home improvement, especially that related to building, is something reserved only for those who were born with two left thumbs. This is simply not the case. Anyone can take on a home improvement project and create something wonderful if they have the right instructions.
Ever dream of having that breakfast buffet in your kitchen? You know, the one where your parents come for a visit, and it’s so nice you all have breakfast together. You would love to have it but in an apartment with a little space, you could never find the right storage to make this happen. Well guess what? With this article , you will learn to build yourself a kitchen island with seating that also gives you enough storage space.
Table of Contents
Build the base and wall of the island
- Remove the baseboard from the wall where you are planning on building your kitchen island. This can be done with a pry bar.
- Measure the height of your kitchen counters and add two inches. Measure out this distance on your wall and make a mark. Use a level to draw a horizontal line across the wall. You will want to build your kitchen island so that it is flush with at least one side of your counter, meaning that it is even with the top of your counter when complete.
- Measure the width of where you plan to install your kitchen island and transfer that measurement onto your wall as well, making sure it is even with the height line you have just drawn. This will give you a box that represents where you will build your kitchen island against the wall.
- Cut two pieces of 2 x 4″ lumber so that they match this measurement perfectly. These pieces will form the bottom frame for your kitchen island. Attach them to each other in a perpendicular fashion using 3″ wood screws, creating an “L” shape. The bottom piece should run along the floor, while the vertical piece should be attached to it at 90 degrees to represent where your wall will be when installed.
Build the seating area
Cut two 2-by-4s to 18 inches and one to 30 inches. Line the three boards up, side by side, leaving about 4 inches between the two 18-inch boards. This is the top of the seat. Make three marks on each side of the seat at 4 inches from the ends and in the middle.
With a drill, screw in two screws on each side going into each board to affix them together at each mark. Flip over and place a piece of wood over where you just screwed pieces together to prevent splitting. Do this for every joint.
Add the countertop
Your last step is to install the countertop. For a bigger island like ours, you may want to add some additional support between the cabinets and underneath the countertop. This will help distribute the weight of the countertop more evenly throughout your island.
If you used a large sheet of plywood for your countertop, you’ll need to cut it down to size and attach it to the top of the cabinets with a nail gun and glue. Then use a belt sander with medium grit sandpaper (120 grit) and then fine grit sandpaper (220 grit) to sand down any rough spots in the wood.
Stain the island
Apply wood stain to your new island to protect and finish your work.
Follow the instructions on the can, and make sure you use a stainable finish when building your kitchen island. Apply a coat of stain, let it sit for about 10 minutes to soak in, and then wipe off the excess. Let it dry for three days before adding another coat.
Position the top on the base and secure with screws from below. If you’re able to, stain the island before securing the top so you’ll be able to get complete coverage and avoid drips.
Install molding, shelves, and hooks
Now that you’re almost done with the kitchen island project, it’s time to add decorative features. It’s up to you whether or not to paint the moldings in a different color from your base cabinets. Use construction adhesive and finish nails to secure the moldings to the top and bottom of your island.
Install open shelving underneath for easy access. If you have room on both sides, install hooks for hanging utensils or towels. You can also install a dish drying rack similar to those found in many European kitchens.
1. Cut molding to length using a miter saw.
2. Paint or stain the molding, then attach it to the island using construction adhesive and finish nails.
3. Install shelves on either side of the island using 1×2 furring strips and screws.
4. Mount hooks alongside the shelves using screws, or use adhesive hooks such as Command Hooks that won’t mar your walls.
Conclusion
You can build a kitchen island with seating using basic DIY skills. Building a kitchen island with seating is a more difficult project than you might imagine. It can be done, but it’s going to take some serious planning and some expert-level DIY skills. So, make sure you know the basics of woodworking, have access to proper tools, and know what you get into before starting your project.
Building a kitchen island with seating may seem like an overwhelming project, but we assure you that it’s surprisingly simple. If you have the right tools and materials on hand, and if you carefully follow our step-by-step instructions in this plan, you should be able to complete your island in just a single day.


