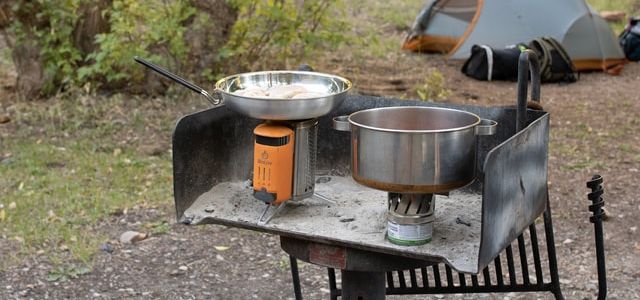
Prepping up cooking gear doesn’t mean you should not think about the cooking environment. You need to create an efficient and comfortable environment for cooking. A slide out kitchen is the best choice for your camping needs because it has all the interior facilities that you need for cooking.
Building a slide out kitchen within a camper van is not as easy as it may at first seem and involves more than a few bricks, bolts and some plywood. But if you plan correctly, work methodically and keep an eye on your budget,you CAN build your own portable slide-out kitchen to make eating easier, cleaner and more comfortable and that’s when things can get really exciting. Camp kitchens can be rather small and only allow for a little space to work with.
Table of Contents
Measure our interior width of the camper
- If you want to make sure that our slide out kitchen would fit snugly in the camper when it was in the open position and clear whatever we had on the inside of the camper when it was closed.
- If you are building a slide out kitchen for a smaller camper, you may be able to get away with using 3/4″ plywood for your entire platform. Add1×3 lumber on top of the plywood base and screwed it in place with 2″ wood screws.
- Cut two 2x4s down to size, drilled pocket holes in each end, and attached them directly under our plywood base using wood glue and 2″ wood screws.
- use 1×2 poplar boards around the outside edge of our box to create a frame for our 3/4″ plywood top which we purchased at Home Depot.
Cut the sheet metal to fit the interior width of the camper
- Cut the sheet metal to fit the interior width of the camper.
- Grab the plywood sheet and cut it down to size, making sure it fits in between the two sides of the sheet metal door
- Trace around your sink to make a hole for your sink.
- Drill some pilot holes around your circle and then cut out with a jigsaw
- Get your faucet and drill two pilot holes in the bottom of your plywood countertop. Then screw in your faucet
Use a spray paint
- Use Rust oleum’s Painter’s Touch 2x Ultra Cover in Satin Dark Grey. This is a paint and primer in one, which is great because you don’t have to worry about using a primer first. The spray paint will definitely take more than one coat, unless you’re using a dark color on top of a dark color.
- After the camp kitchen was painted, add some storage baskets. They’re inexpensive and they make it easy to organize your camp cooking gear.
Add wood glue
To build a slide-out camp kitchen, all you need is a box of plywood and some drawer slides.
- First, we built the box for the actual kitchen
- Cut the plywood to the correct size for your box Add wood glue to all the edges of each piece of plywood
- Nail together your box pieces
- Once your kitchen is built, it’s time to add your drawers. Just follow these steps.
- Cut plywood to the size of your drawer fronts and sides. Ours were 12″x12″.Add wood glue to each piece of wood and attach with nails.
- Each drawer should have one front, two sides and a bottom.
- The bottom should be nailed into place from the outside of the side pieces so that it can’t be seen inside the drawer.
Stack each piece and clamp it
- Bring piece of cheap plywood at Lowes and cut it to the same length as the bottom frame.
- Then attached it with screws, making sure not to go too deep so that they would poke through the opposite side. Be sure to use wood glue with your screws as well.
- Cut two side pieces, the bottom frame, and my back support. I used wood glue, clamps, and screws to attach all of these pieces together.
- Once those were dry and screwed in place, moveon to building the top frame.
- Clamp each end piece together and then measured out where to place the middle cross bar.This will vary depending on how big your table top will be.
- Then cut table top from 3/4″ plywood using a jigsaw and finished it off by sanding all of the edges smooth.
Screw in any new screws
- The first step is to determine your height and preferred angle of the table top. We went with a 45* angle which was optimal for sitting up while eating.
- The height depends largely on your vehicle, we built ours to be 32 inches tall with the table sitting 1 foot off the ground when folded out and 2 feet off the ground when folded up.
- To attach your table top, use 3 hinges about 8-10 inches apart on each side.
Conclusion
In conclusion, the slide out camp kitchen is a great form of outdoor furniture that has many uses. It helps to keep your food and cooking area organized, with quick access for all the people you invite over for dinner or some campfire cook outs. Using a slide out camp kitchen is pretty easy. But there’s always a little bit of planning and calculating to ensure that it’s just right for your camper van.
Slide out camp kitchens have done away with the need to cook in a small confined kitchen outside, where weather extremes could make it nearly impossible to safely cook. The slide out kitchen is made from high quality aluminum that is strong and durable, but it’s also lightweight enough for easy maneuvering. Now cooking outdoors can be enjoyable for the whole family!
