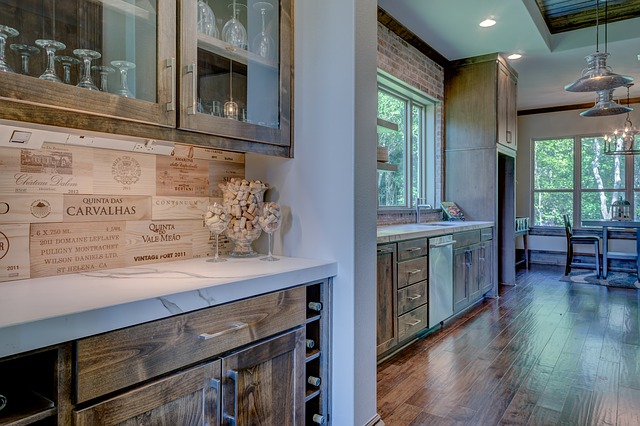
Amongst the cabinets that adorn our kitchens and bathrooms, the kitchen has one characteristic, it’s open. This means that many things aren’t hidden within the cabinet and can easily be seen, or at least their presence can be felt whenever we open up the doors.
It is expected that the kitchen should have all manner of cleaning products within it in order to make it shine just like any other room in the house but there might be a time when your method to cleaning isn’t enough or perhaps you didn’t know what you’re supposed to be using when cleaning your cabinets.
How much time do you spend in your kitchen? If your answer is more than 15 minutes a day, chances are that you want it to be as clean as possible. Clean kitchen cabinet is the cornerstone of a kitchen, therefore cleaning them should be formulated into daily routine.
Table of Contents
Materials and Tools
- Wood cabinets
- Baking soda or vinegar
- Water
- Dish soap or mild liquid cleanser (optional)
- Warm water; spray bottle (optional)
- Lint-free cloths or microfiber cloths
- Toothbrush (optional)
- Bucket (optional)
- Rubber gloves (optional)
Remove the hardware
- Remove the hardware from the cabinets. Place all the screws, knobs and hinges in a plastic baggie or small bowl so you don’t lose any pieces. If you don’t want to remove the hardware, use painters’ tape to mask it off so you don’t accidentally get paint on it.
- Wipe down your cabinets with a clean rag or sponge to remove any dust or debris.
- Use a toothbrush dipped in TSP (trisodium phosphate) or Krud Kutter to scrub any areas that have built-up grease and grime. You can find both at your local hardware store.
If there is extensive grease and grime buildup, use a degreaser like Simple Green or Concrete & Driveway Cleaner and Degreaser.
Brush it off
The best way to clean wood cabinets is with a mixture of mild dish soap and warm water. For greasy spills, add a few drops of ammonia to the mixture for a little extra shine.Clean your cabinets in sections, working from top to bottom, using the same technique you would use to wash your car.
Start by spraying one section at a time with the cleaning solution by brush. Then wipe it down with a soft cloth or sponge in the direction of the grain until it is clean before moving to the next section.
Wipe off excess moisture and buff dry with another soft cloth.
Scrub it down
Whether you’re cleaning wood, laminate or metal kitchen cabinets, the basic process is the same. With a few simple tools and supplies, you can make your cabinets look as good as new.The first step to clean kitchen cabinets is to gather together all of your supplies. You’ll need a sponge or cloth, warm water, dish detergent and a mild abrasive like baking soda or Comet.
Start with a solution of warm water and dish detergent. Dampen a cloth in the soapy water and wring most of the excess out. Wipe down the exterior of your cabinets thoroughly to remove any grease or grime buildup on them. If you have especially dirty cabinets, you may need to use an abrasive cleaner like baking soda or Comet (mixed with water) on a damp sponge or cloth. Rinse the cloth frequently and wring it dry between wipes to avoid spreading filth around.
Let it dry
Start by divesting cabinets of any contents, then take off the doors and remove all hardware from the surfaces. If you’re painting a wooden surface, remove any glossy finish. Use a fine grit sandpaper or sanding sponge to scuff up the surface, wipe clean with a damp cloth and let dry completely.Once the cabinets are prepped, protect countertops and floors with drop cloths. Prime cabinets with a bonding primer designed for the surface you are painting. Let it dry according to package directions.
Paint cabinets using a high-quality synthetic bristle brush or roller specifically designed for use with water-based latex paint. Work in small sections and use horizontal strokes on flat surfaces and vertical strokes on cabinet doors this will help make any brush marks less noticeable if they occur. Let it dry completely before applying a second coat, if necessary.
Reattach the hardware and enjoy your new cabinets
- You may need to use a rag soaked in mineral spirits to remove any remaining grime.
- Wipe your cabinets clean with a soft, dry cloth. You can also use microfiber or cheesecloth for this step.
- Reattach the hardware and enjoy your new cabinets.
Conclusion
Everyone wants their kitchen to look clean, but there are many options for cleaning kitchen cabinets; from DIY options to professional. For example, if you choose to clean your own cabinets you can use vinegar and baking soda to remove stains. On the other hand, if you want your cleaners to do the work for you, oxygen bleach is a great option. Regardless of which cleaner you choose, be sure to use safety protection. Since our wipe down method is time-consuming and involved a bit of cleaning product, you may not want to follow it every three months.
However, it’s a great way to really de-clutter your cabinets if you are noticing that things aren’t staying nice for very long. Remember that magnets and tape will probably ruin any wood finish, so make sure to avoid them. Also use products that are meant for kitchens and don’t leave a residue behind. A quick wash with hot water and dish soap should clear away any hairspray or polish that ends up on the walls or drawers. Be sure to keep your kitchen cabinets clean so they don’t get out of date or your valuable space in the cabinets will begin to fill up with clutter!


