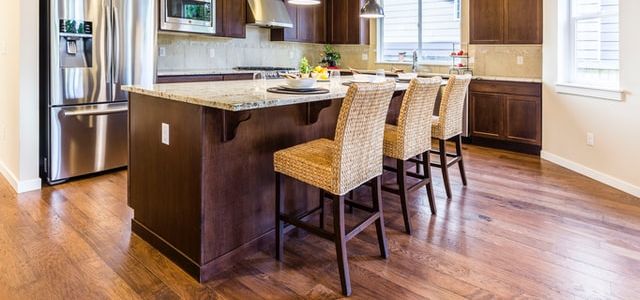
A kitchen island can be a useful feature for a kitchen. It has been assumed that the kitchen island is not particularly relevant from a design point of view and more so from an ergonomic and practical point of view.There are many factors involved in determining which method to use when securing a kitchen Island.
These factors include: the floor type, weight and location of the island.Having an island in your kitchen can be a nice way to increase the utilization of your kitchen space. It makes a great place to chop and prepare food while entertaining guests. That is, if you can make sure it doesn’t wiggle or move when you use it.
Table of Contents
Measure the weight
- Measure the weight of your island, if you’re unsure of the weight and you have a standard kitchen island with no built-in appliances, then you can assume that it is 100 to 200 lbs (45 to 91 kg).
- Measure the length and width of your island’s base, use a tape measure to find out how long each side is. This will give you an idea of what size fasteners to use.
- Look at your floor type, Different fasteners are needed for different types of flooring. You should be able to see what kind of flooring you have with a quick look in your kitchen area.
- Hardwood floors: You will need screws designed for hardwood floors or 1/4″ dowels made from hardwood if they are not provided by the manufacturer.
- If you are using dowels, drill holes into the flooring that match up with where the plates on the legs will touch down.
- Check that there aren’t any pipes or electrical wiring underneath your floor where you want to anchor the legs of your island.
Mark the floor
- Mark the floor where you want to place the island.
- Check for studs and plumbing with a stud finder, and mark those locations on the floor as well.
- Drill holes in the floor at each corner of the island using a 1/2-inch drill bit. Use a tape measure to ensure these holes are 22 inches deep, so they meet up with the threaded rods that will be inserted into them.
- Place your island in the desired location on the floor. Hold it firmly in place while someone screws four 3-foot long 5/8-inch diameter steel threaded rods into the holes at each corner of your island.Measure and cut four 5/8-inch steel plates that are 6 inches wide by 8 inches tall using an angle grinder or hacksaw.
Fix battens
- If you are installing a kitchen island, it will be necessary to fix the structure to the floor. This is done by affixing battens around the base of the kitchen island. If the kitchen island is free-standing, there will be four battens, and if it has cabinets on one side, there will be three.Fix battens to the floor using appropriate fittings.
- The battens should be screwed into the floor through a hole drilled in advance of fitting them.
- You can then screw or bolt your kitchen island to these batons.
- Make sure that you use screws or bolts which are long enough. You will need to screw or bolt from both sides of the cabinet, preferably with two screws per side.
- The last thing you want is for your well-fitted kitchen island to come loose and move about when someone leans against it!
Rest the island and attach through to its underside
It’s a good idea to fix your kitchen island to the floor with battens. This will stop it moving around when you’re working on it, and prevent it from toppling over if someone leans on it too hard.\
- First, identify where the battens will go underneath the island. There should be one towards each end and in the middle so that they’ll overlap with the joists below.
- Rest the island on the battens and attach them through to its underside.
- You can fix them in place using wood glue and screws, or by drilling through the battens into the floor joists underneath. For added strength you can use adhesive pads between each end of the batten and the floor.
- Finally, add a smooth finish to the bottom of your island with a piece of MDF or plywood so that it doesn’t scratch or mark your floor as it moves around.
Fix the kitchen island down
- First, cut the plywood pieces and place them on the floor where you want the island to sit. They should be in a T shape. This makes it easier to fix the kitchen island down to the floor.You’ll want to make sure that they are level and fixed firmly in place. This means using screws rather than nails or glue.
- You can also use masonry anchors if your kitchen floor is tiled.
- Once you’ve put the plywood pieces down, you can fix your kitchen island to them with screws. This will help to ensure that it doesn’t move around when you’re using it.
Conclusion
Adding a work surface to your kitchen can make the room function much more efficiently. Putting this work surface on top of the floor allows you to utilize all of that valuable cabinet space underneath to store extra plates, glasses, and cookware. The only problem is that this island usually doesn’t weigh enough to stay in place once it’s moved around. You will quickly discover how easy it is for the whole island to move on your hardwood floor.
Fixing an island to the floor is definitely not as difficult as it sounds, but there is a bit of a learning curve involved until you get used to working with wood and nails.
