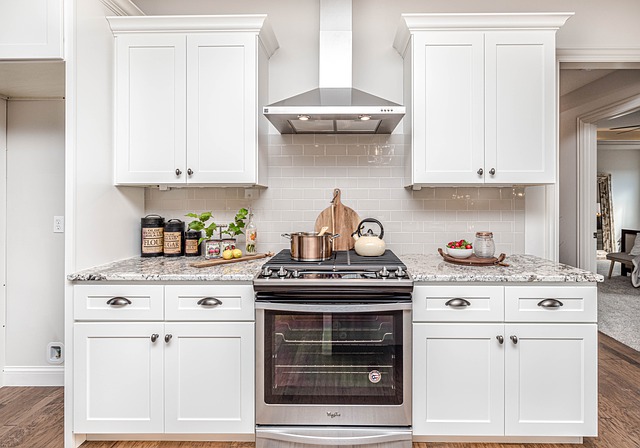
When you need to refinish cabinets, do you sand? Of course not, why would you sand. You’re trying to save time and money. The fact is, most of the time, you won’t need to sand down to bare wood before painting kitchen cabinets. There are times when you will undoubtedly have to sand down the cabinets (when it comes to removing scratches from furniture polish or from spilled nail polish remover or anything involving children or pets).
We all want to save some cash wherever we can. Especially when it comes to painting, renting a paint gun or painting supplies is expensive and takes time. Instead of trying to perfect the process, hopefully this post will be able to guide newbies with as little mess and costs as possible.Painting kitchen cabinets is one of the cheapest and quickest ways to makeover a kitchen. And here’s step-by-step guide for you.
Table of Contents
Use a degreaser to clean off the cabinetry and remove all the dirt, grime and grease
To remove the grease and grime that has built up over the years, I like to use a degreaser and some paper towels. You can also use trisodium phosphate (TSP). Using TSP substitute is far less toxic than the original TSP, but it is still not environmentally friendly or safe for children or pregnant women. I would recommend using gloves and eye protection if you do choose to go this route.
Remove the hardware, including knobs and handles
Remove the hardware, including knobs and handles. Label the doors on the inside of the frame with painter’s tape so you can put them back in the same place later. Remove the doors from their hinges and remove any other accessories attached to the cabinet frames. If there is any excess paint or caulk around your cabinets, use a putty knife to remove it. Put everything in a safe place.
Clean your cabinets with a trisodium phosphate solution to remove any residue left behind from the degreaser
Clean your cabinets with a trisodium phosphate solution to remove any residue left behind from the degreaser.To make a TSP solution, mix approximately ¼ cup of TSP with a gallon of warm water. Use a rag and wipe down all cabinet surfaces including the front and back of the doors and drawers.
Use an orbital sander or sanding sponge to lightly sand each surface. Be sure to not over sand as you just want to create a smooth surface for the paint to adhere to. This process will take a while so be patient! Wipe clean with tack cloth.Apply primer using a nylon/polyester brush or foam roller (I like Purdy). Apply 3 coats of primer, allowing each coat to dry completely before applying the next.
Fill in any holes or scratches with wood filler, sand it down and apply a coat of primer paint on it
Fill any holes with wood filler. Apply it with a putty knife and scrape off any excess so it’s flush with the cabinet surface. Let it dry completely before you move on to the next step.Apply a coat of primer on all surfaces of your kitchen cabinets using a paintbrush. Allow to dry overnight or as directed on the label. If you’d like to spray your cabinets then I recommend using Rust-Oleum Cabinet Transformations Primer Kit but be sure to follow the instructions exactly and take necessary precautions when using the sprayer.
Apply the paint according to manufacturer’s instruction
Begin by painting your cabinets a base coat. You can use a paint brush or paint roller, but a sprayer will make the job go much faster and give you a better finish.Once the base coat has dried, apply a second coat using the same method. If you are using paint that doesn’t require a primer, you can skip this step.After the second coat dries, apply masking tape to any areas of the cabinet that you don’t want to get paint on. Use blue painter’s tape, which is easier to remove than other types of masking tape.
Apply two coats of glaze over the base color in the same way as you applied the base color. Apply the first coat with a brush or roller and use a sprayer for the second coat if desired.After it dries, remove the tape and then apply wax and/or polyurethane to protect the paint job
Reattach your cabinet doors and hardware
- Use a grease-fighting dish soap to clean your cabinets. This is the one I use: Dawn Ultra Dishwashing Liquid Soap.
- Use this deglosser to wipe down all surfaces of your cabinets (face frames, sides, etc.) This will help the paint adhere properly to the cabinets.
- Paint the face frames of your cabinets with this paint/primer combo, using a quality brush and foam roller. Make sure to get all edges, nooks and crannies.
Conclusion
Painting kitchen cabinets without sanding is less time consuming and less work. The prep work can be tedious, but the finish result is worth it. Whether your cabinets are made from wood or particle board, you will still be able to paint them without having to sand them beforehand. You can also stain them instead of painting them, if that is your preference, but you will still have to follow the same steps they just might take a little bit longer if you’re staining rather than painting.
In short, you can choose to cut corners and save time by not sanding the cabinets, or you can follow the steps above to ensure that your kitchen cabinets have a smooth finish and are easy to prep when painting.
We hope you now feel more confident about painting kitchen cabinets without sanding. While this may seem like a lot of prep work, the end result is well worth it: to be able to paint kitchen cabinets quickly and effectively, leaving you proud of your DIY project.
