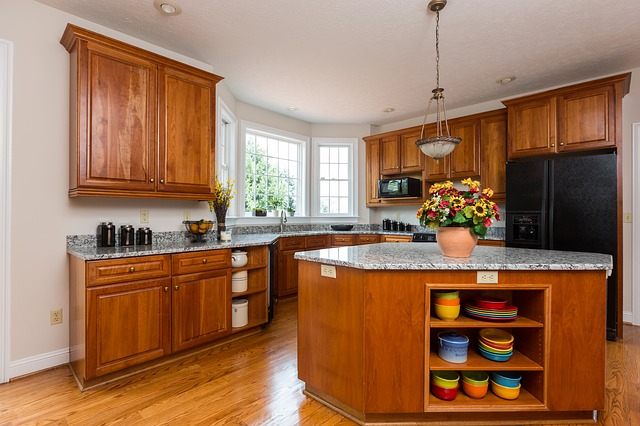
Refinishing kitchen cabinets can be a pretty big job. Previous homeowners of the house I bought for my family’s new place probably rushed through this project, but I know better than to do that. There is a lot of work involved with refinishing kitchen cabinets, and I want to make sure I get it right. From start to finish, you’ll get ideas on how to refinish kitchen cabinets while making the process go smoothly.
Refinishing cabinets is a cost-effective, hassle-free way to add value to your kitchen. But if you have ever tried to refinish cabinets, you know it’s not as easy as it sounds. There are a lot of factors that go into refinishing cabinets successfully. If you’re new to refinishing cabinets on your own, I know that this can be overwhelming to take on. That’s why I created this course for you.
Table of Contents
Remove the doors
Remove all the cabinet doors and drawers. Make sure you label each door, as well as its corresponding cabinet opening, using masking tape and a marker. That way it’ll be easy to put everything back together in the same order
By Using a screwdriver, unscrew your cabinet doors from the hinges. Make sure you keep track of which door came from which cabinet and which side each hinge was on, because this will make it easier to replace them later.
Remove hinges and handles
- Unscrew the hinges with a screwdriver and remove them from the doors. Remove the handles by pulling out the screw with a screwdriver.
- Fill any holes with wood putty and let dry completely. Sand all surfaces until they are smooth to the touch. This is a good time to add decorative touches like beaded-board backsplashes or wainscoting anything that will require painting alongside the cabinets.
Sand the doors
Remove the doors and drawer fronts, then sand them with 150-grit sandpaper to remove old paint and roughen up their surfaces. Don’t bother sanding the cabinet boxes; they won’t be visible when you’re finished. Wipe off the dust with a tack cloth or damp rag.
Once your doors are prepped, sand them down with a medium-grit sandpaper until they have a smooth finish. If necessary, apply wood filler to small nicks or holes with a putty knife then sand again once it has dried completely.
Prime the doors
“I’ve always had good luck with a shellac- or alcohol-based primer,” says longtime pro John Dee, editor at Large of Family Handyman. “It dries fast and blocks most stains.” Apply it with a 3/8-in.-nap roller and a primer brush. Let each coat dry for about an hour before applying the next coat, and sand lightly between coats to remove any bumps or fuzz.
Paint the doors
Use a paintbrush or foam roller to apply a thin coat of oil-based primer to all surfaces. Let dry for two hours before painting on a thin layer of oil-based enamel with either a paintbrush or foam roller. Make sure your work area is well ventilated as you work, and keep the windows open for at least another day as the paint dries and cures.
Paint the exterior of your cabinets in stages so you don’t have to rest your brushes or rollers anywhere that won’t eventually be painted over if you need to set them down, do it on painter’s tape in an inconspicuous spot like inside a cabinet door frame. Use two coats of oil-based primer, letting each coat dry for at least four hours before applying the next one.
Reinstall the doors and hardware
- Remove the doors and hardware. With a cordless drill, remove the screws holding the hinges in place. If you’re going to reuse the hinges, label each one with a piece of painter’s tape so you can reassemble them in exactly the same positions.With either a paint stripper or heat gun, remove all paint from doors and cabinet frames. Do not use sandpaper on the laminate veneer surface of your cabinets or it will be permanently damaged.
- Strip the metal hardware using a spray-on paint stripper such as Klean-Strip Easy Liquid Sander Deglosser or Citri-Strip Paint & Varnish Stripping Gel. Let it sit for 10 to 15 minutes, then scrape off the finish with an old plastic spoon or putty knife.
- Remove remaining paint using a nonabrasive plastic scrub pad ($3) and mineral spirits. You may need to make several passes with fresh mineral spirits to get rid of all traces of stripper residue, especially in crevices and corners.
- Wash and dry all surfaces thoroughly before proceeding to step 4.
- Fill holes left by missing hardware with wood filler, preferably one that dries hard, such as Minwax High Performance Wood Filler.
Conclusion
Refinishing kitchen cabinets is a simple way to update your kitchen that can be completed in a weekend or less. Refinishing your kitchen cabinets can be a fun change for your kitchen. It is inexpensive and the results can be beautiful. If you are currently considering refinishing your kitchen cabinets, make sure to consider all of the benefits before you decide. It may save you money in the end to go with a contractor to do it for you, but at least you will know how easy it is to do it yourself if you want to.
Refinishing your cabinets has the potential to update the look of your kitchen for relatively little cost. It’s an easy way to make some under-appreciated cabinets shine again, or to give older cabinets a refreshed new look when moving into a new home. The results can be impressive, and you’ll definitely get more than your money’s worth. So, if you’re looking for an inexpensive way to refresh your cabinets, refinishing is a great choice.
