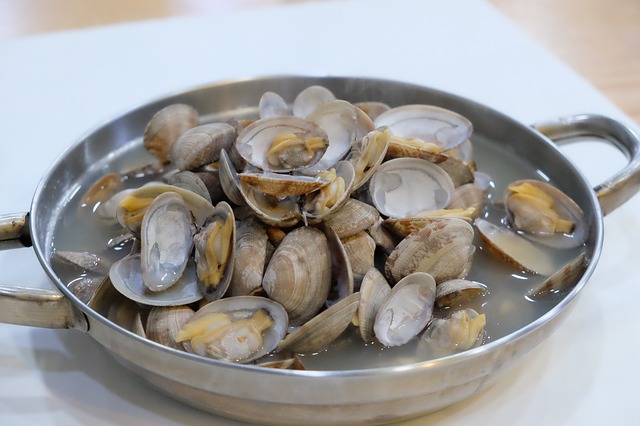
Clams are bivalve mollusks that are part of the Bivalvia class, which includes mussels, oysters, and scallops, as well as other sea- and freshwater creatures with a two-part hinged shell. Clams contain two adductor muscles that help to hold their shells intact, and a burrowing foot that helps them to dig in the sand and soil. A large portion of their lives is spent submerged in sand or dirt beneath the surface of the ocean or a river. Clams are normally available for purchase in the supermarket or from a fishmonger, depending on the season.
Fresh clams should not have cracked or broken shells, so look about them at the grocery store or at the fisherman before you buy them. It is important to make sure that the clam shells are properly closed; open or damaged shell mussels or clams should not be consumed because they are indicators of dead mussels.
Cleaning Clams
Initial inspection should be performed to rule out any bad apple’sclams. If you don’t, throw them out when they’re probably dead. In view of the fact that soft shell clams will not entirely close, a tapping motion with a finger should enable the clam’s neck to extend to some degree. Toss it if there isn’t any movement.Having removed any dead clams, which are a breeding ground for germs due to its capability to reproduce quickly, you’ll have to clean the live clams, both outside and inside. All you need is three large basins, cold water, and a scrub brush to do this task successfully.
- A little cornmeal in the water can be beneficial for cleansing the clams, but salt should be sufficient in most cases. To prepare the clams for soaking, add enough salt to the water to approximate ocean saltiness, and place the bowl in the refrigerator for 20 minutes.
- Bowl of cold, salted water should be ready to go. The clams should be moved from one soaking vessel to the other by lifting them out after the first one. Using a strainer to take them from one bowl to others is not recommended since you will end up pouring the gritty water back over the clams.
- Allow them to soak for another 20 minutes in the other dish of clean, cold, salty water in the fridge.
- When the second soak is complete, fill another dish with cold, salted water and transfer the clams from its present basin to the other one, repeating the procedure. If the third time’s the charm, it’s a good sign. You may, however, wish to repeat the process, once or twice, if there is a lot of sand in the bottom of the bowl after you have completed it.
- Finally, use a stiff-bristle brush to scrub each clam to remove any grit or debris that has accumulated on the shells.
- Afterwards, they’re all set to go.
Shuck clams in the proper manner
Chilly clams are simpler to shuck, so make sure they’re still cold when you get to this step. Pulling the top shell up should be possible at that point.The upper shell must be completely removed if you’re serving clams raw; otherwise, simply dump the flesh and fluid into a bowl, taking out any parts of shell that may have chipped away during the opening process.
To remove salt from clams, follow these instructions
This procedure is only necessary for the clams that you harvested yourself. Because the clams contain a large amount of seawater, it is necessary to place the rack/sieve once more to de-salt. Clams may taste too salty if this process is not performed.Having spent their entire lives curled snuggly on the ocean floor, happily sucking sand along with the rest of their meal, these guys have earned their keep.
Farm-raised clams are usually cleaned and washed of sand before they are sold, so cleaning them is not a major concern.To begin, gently tap any clams with open shells against the counter top until they are closed up completely. Fill a large dish halfway with cool tap water and add all of the clams. Wait anything between 20 minutes and an hour before opening the clams. When you’re ready to boil the clams, remove them from the water and wash outsides each one to eliminate any debris or grit. It is preferable to lift them one at a time since straining them into a colander would result in the sand being re-deposited on top of the liquid.Clams are ready to use in your recipe once they have been cleaned.
Instructions
Because the clams will not be used immediately, it is vital to de-grit them immediately after returning home from the grocery store. Placing them in a fridge will reduce their metabolism and may prevent them from purging sand later.
Purge the clams of any leftover sand
- The sand that has been purged settles to the bottom of the rack/sieve and will not be ingested by the clams anymore once it has been removed. Fill the tray/bowl halfway with salt water. Make sure that the salt water is just around the clam’s mouth and that the clams are not completely submerged in the salt water. Alternatively, if there isn’t enough salt water available, additional can be made using the same water and salt proportions.
- Cover the top of the container with aluminum foil (clams prefer a calm and dark environment), leaving a small opening at one corner for air circulation. Water temperatures of roughly 69oF/20oC are optimal for clam activity and reproduction. The time it takes for the clams to purge sand is about 6 hours if they are collected from the beach.
- Removing the aluminum foil cover and removing the rack/sieve after 1 hour is recommended. Empty and clean the tray/bowl of the contaminated salt water.
