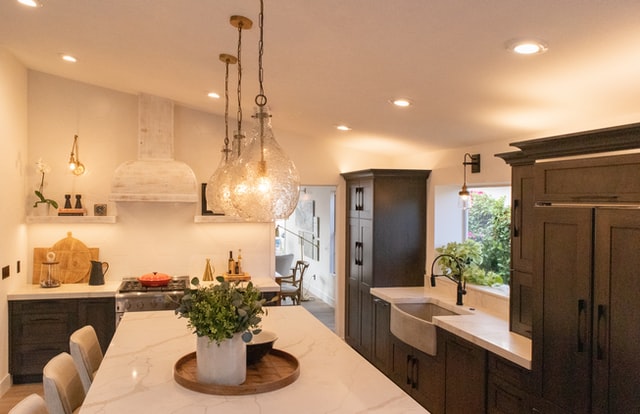
Unfortunately, the kitchen in almost every home or apartment needs to be updated at some point. This is where choosing cabinet paint colors can be daunting and stressful, because there are so many choices it may feel impossible to choose just one. There are many kitchen cabinets paint colors, but they can be divided into two types natural finish and glossy.
Color trends change by season, but of course I will try to focus on popular colors that will help you get a modern, fresh look for your kitchen cabinets. We will go over which colors to choose according to your preferences and dominant style. Before we proceed with the actual color recommendations, let’s discuss how to get a smooth finish when painting kitchen cabinets.
Table of Contents
Buy a High-Quality Paint
For smooth paint, you need a high-quality paint. The best paint for kitchen cabinets is typically high-gloss or semigloss latex-based paint. Kitchen cabinets take a lot of abuse, so choose a paint that is easy to clean and resists stains. Paint finishes are rated on a scale of 1 (flat) to 5 (high gloss). Semi-gloss paint is usually around number 4 or 5. Eggshell finish is around number 2 or 3. Flat and matte finishes will absorb grease and be impossible to clean.
Use a roller with a very short nap (1/4 inch to 3/8 inch)
Before you begin painting, remove cabinet doors and drawers and take off all the hardware. Clean the surfaces well with a grease-cutting detergent. Once dry, lightly sand all surfaces with fine-grit sandpaper (100 to 150 grit) to make sure the paint will adhere well. After that’s done, dust and wipe down the surfaces again to remove any residual dust from sanding.
Use a roller designed for smooth surfaces. I recommend using a 3/8-inch nap roller cover for an ultra smooth finish. A brush can leave brush strokes, so rolling is a better choice. Make sure you buy the right type of paint, too: Satin or semi-gloss latex paint is durable and easy to clean up.
Clean the surfaces thoroughly
Sanding removes imperfections and helps the primer adhere better. Start with 220-grit sandpaper, which is coarser than standard paper, but not so coarse that it will gouge the wood. Sand only along the grain of the wood.
Use a stiff-bristled brush to remove sanding dust from all surfaces, including the cabinet doors and drawer fronts. A vacuum with a soft brush attachment also works well. If you’re working in a room that’s not well ventilated, wear a dust mask.
Sand the surface lightly
Sand the surface lightly. Any glossy surface should be scuffed so the paint will adhere well. This is especially important if you are painting over a previously painted or laminated surface. Use 150-grit sandpaper to lightly go over the doors and drawer fronts, sanding down any shiny areas, corners or scratches you come across.
Prime the surfaces thoroughly
The key to getting a smooth finish when you’re painting kitchen cabinets is the preparation. Prime the surfaces thoroughly and sand between coats.The primer should be one that’s designed for adhesion, such as BIN or Bullseye 123. Or, if you want to save a few steps, choose a paint that contains primer. The best options are typically oil-based paints, which have the smoothest finish and are easiest to sand.
After each coat of primer or paint, use a fine-grit sanding sponge to smooth out any drips or brush marks. Make sure to sand all areas of the cabinet in the same direction to avoid creating crosshatch marks in the surface.
Paint the surface with one or two coats of paint
To get a smooth finish, paint kitchen cabinets with a high-quality paint roller. For the best results, use a short-nap roller that’s been designed specifically for use on smooth surfaces.Before painting your cabinets, clean them thoroughly and sand their surfaces with fine-grit sandpaper. After sanding, wipe the surface with a damp cloth to remove all dust particles.
Apply an even coat of primer to the cabinets and let it dry. Sand it lightly once it has dried and apply another coat of primer or two until the surface feels smooth. Paint the surface with one or two coats of paint.
Protect the finish with a final coat of polyurethane
To get a perfectly smooth finish on painted kitchen cabinets, you need to build up a series of thin layers. The trick is to allow each layer to dry thoroughly before applying the next.The first step is to apply a primer to the cabinet surfaces. Once it’s dry, sand it with fine-grit sandpaper until it’s perfectly smooth and then wipe away any dust with a tack cloth.Now you’re ready for your first coat of paint.
Your final coat should be a color that matches your décor and will look great as part of your kitchen design. If you’re not sure what tone or shade that should be, consult with an interior designer or visit one of our showrooms where we can help you find just the right color for your space.Once the paint is fully dry, apply a coat of polyurethane for added shine and protection against stains and scratches.
Conclusion
Aside from color selection and application of paint, your oven’s preparation is the most critical step in achieving a smooth finish when replacing kitchen cabinets. Before you begin painting, take extra time to make sure that your oven is clean and free from scratches or other blemishes.
Prior to painting it’s a good idea to check that the metal surface of your oven is rust-free. You may think this only applies if you have a metal oven door, but if your oven has a glass door this precaution can help prevent any rust spots from appearing on the glass after painting.
